
 Okay so it's time to show you guys my process on my drawings. I decided to do something a little more epic in my regards. I've decided to do something fantasy oriented. I wanted to make a subtle elf with more than one wand. Easy I thought. So I tried to screen cap my progress throughout the day.
First, I started off with a neutral background in Photoshop then add some warm flare edge. At this time I really didn't know what I wanted to do. I added some extra strokes here and there with the the fuzzy standard brush. I normally work with warm colors at first but then I desaturated it later. I normally work at 8 1/2 x 11 inches at 300 dpi. (after I'm done with these files I put them in my external hard drive)

Now I start to sketch, I put darkest darks down first. I try to get the shape of what i'm drawing down, at this stage again I don't know what I really want. Alot of this is trial and error. After I'm happy with the dark shapes I add my lightest lights. Normally this is where I want my viewers eye to go. Since I used a yellowish color earlier I use that color and bumed it up a little and added an extra value to areas that I think I need it. Again, alot of trial and error at this stage.

Okay so this is were I fill in the details. First I move the file to Painter IX, mainly because I loved the blender brushes in this program. The brushes I use are under Blenders: Just add water, Pointed Stump 20, and Oily Blender 40. I use I wanted this elf to have a scarf and a heavy coat and holding a wand at a cautioned pose. I use the white again for areas I wish to draw the viewers eye. My Color palette is really the same color but different values. I've found using this method helps out in the end, by having a dead layer you figure out all your value issues first then. You can play with color at a later stage. So once I have gotten the details of the body down just the way I want, I start the face. I do this because I tend to stay that face for quite sometime.

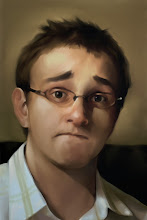
Now I rough out the face (i'm not sure what sex this person is just yet). Still using just the values of the same color. I also flip the image, because you can figure out your mistakes quicker and easier this way. After correcting some areas, I start the background. I've decided to just put her up against a plaster wall, with a dramatic shadow on it. Nothing too complex.
 Okay this may look like I did alot but stay with me. I open this file in Photoshop, and add another Layer, this is for texture. I play with different brushes (I normally play with 20/30 opacity) and erase anything that touches the body. I stepped away from the drawing for awhile then came back and decided it needed something else, something unique. Flying black summoned snakes! Oh I also added shadows on the wall, just to make them feel slightly more believable.
I flip it back and add the final touches to my value study, then comes the color. Basically I just paint over it using overlay, or another layer feature that looks better to me. Also at this stage I thought she needed more wands. I just added them on another layer, and worked at it until they looked alright.
So if I left anything out, or I am unclear on just let me know.
This piece took 8 hours, including research and screen capping it.
I'm going to bed.
No comments:
Post a Comment